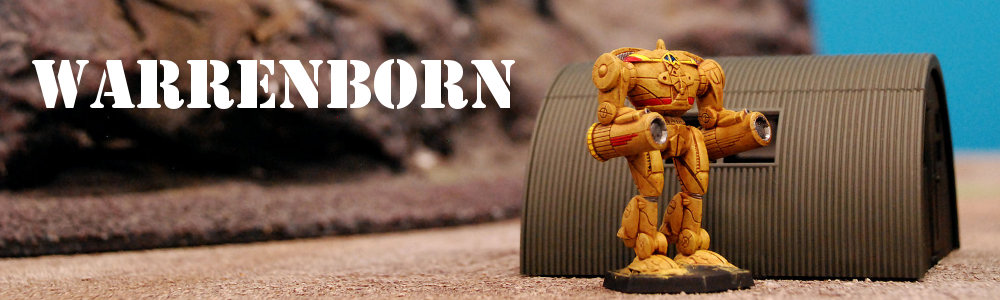


|
Last week we finished up the long and winding road that was the army building. This week we will start on the units and minis. As I appointed out last week, the Septicemia was already done. Before I talk about the Septicemia and its role, I want to talk about the mini.
These Clan Coyote armies started from a Septicemia that I painted for Ben for Christmas in 2011. I didn’t want to do just any mini. I wanted to do something special and unique for him using something from the Wars of Reaving that he wrote like one of the new variants. The AZ seemed to fit the bill.
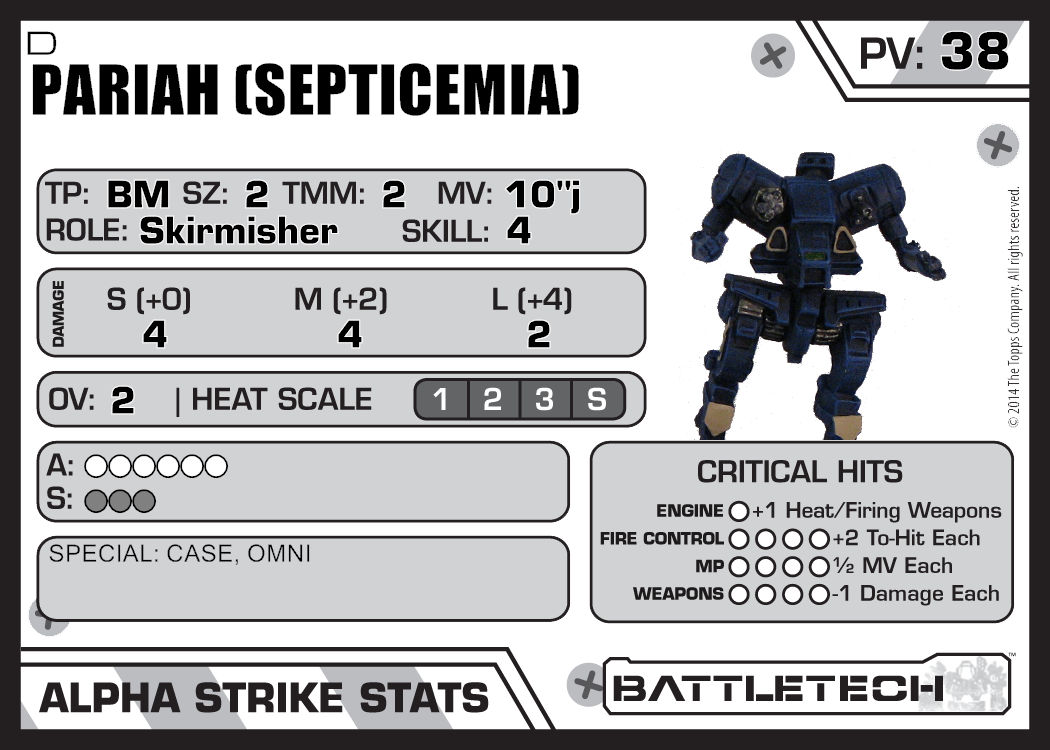
The Septicemia was first introduced in Technical Readout 3075 as the Pariah back in 2008. The mini was introduced in the following year and included variant parts. The mini in the blister comes with parts for the Prime and the D. The mini is well thought out. It uses two chest plates to handle the variants. The Prime uses one set of plates and the D model uses the other set of plates along with the jump jets.
The A configuration requires the purchase of additional sprues that include an ATM plate and trio of the heavy small lasers. Two of these sprues are needed to complete this configuration. An additional mini for the E configuration came out several years later that included redesigned torso and arms. I have not had an opportunity to assemble one of those. You can easily build four of the known variants without having to alter pieces or get fancy with a kit bash. The mini is fairly easy to assemble.
For this army, I chose the version that I had built years ago: the D configuration. So what does it bring to this army of mine? It is a pretty straight forward medium mech. Most of its damage is in the short and medium range. It only does a token 2 points of damage at long range. It does 4 points at short and medium range. No fancy specials to go with it other than the OMNI and CASE which we will see on every mech in this army. An overheat value of 2 will help apply damage when it is needed as long as I can land the hits. The Battle Star’s special ability could help with this.
The structure and armor is pretty standard fare for clan medium omnis. It has 6 points of armor and 3 more points of structure. It will take some abuse but not a lot. It is best to get it in range and dishing out the damage quickly to drop targets before they can send a lot of damage back at it. The 10 inch jump jets will help in moving around the field but it isn’t a speedster. Looking at my army, I don’t have any true speedsters but overall my army is speedy.
So how to use it? Keep it moving and shooting each and every turn. Get within medium range and stay there. It will fight equally well at medium range as short range. No real need to get into point blank range. It doesn’t have a NOVA system to help its star mates (we will be getting to that little trick later.)
Let’s switch gears to the paint scheme. If I have time later in the series, I will try a true paint along but I’m not sure I will have the time to do it. I want to at least explain how I painted these mechs in the hopes of helping someone learn to paint. Of course learning to paint takes practice and a lot of it. Epsilon’s paint scheme is described in Field Manual: Warden Clans as “Epsilon paints its units a dark blue with light tan highlights. Due to their stealthy nature, Epsilon will sometimes alter the base color to a single color that matches the terrain, keeping the tan highlights.”
I will start out with a clean, assembled mini primed black. I prefer black primer due to inevitably missing some small nook or cranny under an arm or around a leg joint. The black tends to work as shadow and blends in better than a lighter color. This does tend to darken your base color unless you take extra steps. In this case, my blue is intended to be on the darker side so I don’t have to worry too much about it.
All of the paints I mention will be from Vallejo’s Game Color line unless otherwise noted. The first layer I’m going to apply is Night Blue. This should be a solid color so a second or third coat may be needed depending upon if you thinned your paint. I typically do not thin my Vallejo paints. Night Blue is a very dark color. It is a cross between blue, purple, and black. Next, I applied a very heavy drybrush of Imperial Blue. This was almost a full base coat. The only places where your Night Blue should still be visible is in your joints and maybe under some hard to reach parts like arms. If I were to start this paint scheme today, I would probably skip the Night Blue and instead apply a wash of Drakenhoff Blue by Citadel over the Imperial Blue followed by a drybrush of Imperial Blue to bring the color back up. I want to keep this army consistent with each other so I’ll stick with my old recipe.
Now we’ll begin to lighten the mini. I’ll apply a drybrush of Ultra Marine Blue to the areas that would receive light from wherever your light source would be coming from. I keep it simple and assume the light is coming from directly overhead. Look to do some on the upper torso, head, top and outsides of arms, and maybe knees or other parts of the legs or feet if they would be exposed to the light. Next I mixed up some Ultra Marine Blue with just a little Stonewall Grey to lighten it. I used a couple of drops of the blue and placed a drop of the grey beside it. I pulled some of the grey in until I was happy with the lighter color. This will be drybrushed very sparingly on the upper most surfaces: On top of the head and shoulders. You may want to do an arm or hand if it is extended and out of the mechs shadow. You may find yourself going back and pulling a little more grey into the mix as you drybrush higher on the mini.
For the trim, I started with Khaki. After coloring in the areas I wanted, I used a 1:1 mixture of Khaki and Bone White to give the trim some depth. I applied this mixture around the edges of the trim and on the upper edges of the trim. Lastly I used straight Bone White on the upper most edges of the trim to give it even more of a gradient.
The cockpit I did for this scheme was an experiment. It turned out okay. I may redo all of them in gold with a Sepia wash but I think I’ll continue with what I did. I like to use metallics on my cockpits. I don’t like a heavy jewelling that seems to be typical of mech minis. I prefer to let the overhead light do the heavy lifting. I like some gradient but not much. I’ve tried a couple of different techniques over the years. For the Clan Coyote Epsilon minis that we already done, I used a Festive Green metallic from DecoArt. The cockpit was fully covered with it. I then applied Waywatcher Green glaze from Citadel. It brightened the color of the green towards the middle of the cockpit windows. It worked well on the smaller cockpits of the Septicemia and Cephalus. I’m concerned for the Timber Wolf that I will be doing. The Summoner and Executioner shouldn’t be a problem. If the Timber Wolf doesn’t work out, I’ll switch all of them to a gold cockpit.
The last step is to paint any interesting parts like gun barrels in Gunmetal. I apply a Nuln Oil wash by Citadel over the Gunmetal to dirty it up. Apply your basing material (which I haven’t done yet) and you are good to go.
Septicemia D
Ben's Septicemia AZ clone
A Call To War: Clan Coyote Epsilon - Part 1
A Call To War: Clan Coyote Epsilon - Part 2
A Call To War: Clan Coyote Epsilon - Part 4
A Call To War: Clan Coyote Epsilon - Part 4a
A Call To War: Clan Coyote Epsilon - Part 5
A Call To War: Clan Coyote Epsilon - Part 6
A Call To War: Clan Coyote Epsilon - Part 7
|
 |
MechWarrior, BattleMech, 'Mech and AeroTech are registered trademarks of The Topps Company, Inc. All Rights Reserved.
|
||


